How to set up remote development
Date:
It's the middle of the summer, the temperature outside is about 30 degrees and i'm hunkered down in my bed, one of the few cool places in the house. With me, i have an underpowered netbook, that, while is light and power efficient, is also pretty unsuitable for any sorts of serious development, its Intel Celeron N4000 being just too lightweight:

If only there was some way for me to get access to more computing power, but keep working on my laptop... Well, there is! And, since i don't want to spend time tinkering with technology specific solutions (like, setting up remote development for Java, which would not work for Python etc.), that solution is called a remote desktop!
With the speed of the Internet connections available to us nowadays, it should be pretty easy to create such a setup and use it without any major performance degradation - even moreso in the case of a homelab, where you might have a few beefier servers in a closet or your basement!
So, let's begin!
The server setup
For the purposes of this demonstration i will be using a VPS from Time4VPS, a pretty affordable VPS provider that i've been using for a few years at this point. Though i'm optimizing for my expenses here - AWS, GCP, Azure, or anything else would work for you as well nicely!
For the OS, i will be using CentOS 8, since i'm piggybacking on top of it for making another tutorial, though the process will be pretty similar for other OSes. So, to begin we'll need:
- a VPS with some distro of GNU/Linux running on it
- the ability to connect to it through SSH, as well as access it from our client device
So, first we'll install some sort of a desktop on our VPS. Personally, i rather enjoy using XFCE because it's both supported on many distros, as well as strikes a good balance between resource usage and usability.
On CentOS and other RPM distros, the process looks like this:
yum install -y epel-release
yum groupinstall "Xfce" -y
Alternatively, feel free to also look at the LXQt and LXDE projects, if you'd like a different graphical environment, though keep in mind that support among different distros might vary.
Next, we'll install a VNC server, which will allow us to actually connect to the server:
yum install -y tigervnc-serverWe'll also need to set up a password to be able to connect to it:
vncpasswdWe'll also need to configure the display for our user, by adding a mapping line to the file at /etc/tigervnc/vncserver.users:
:1=root(note: in most cases you won't want to use the root user like this, but since this is a throwaway server for another tutorial, i'll do that anyways)
After configuring the users, we'll also need to instruct the VNC server on which session should a particular user be using, by adding a few lines to the file at ~/.vnc/config:
session=xfce
geometry=1280x720
localhost
alwaysshared
Here you can choose a bigger resolution than 1280x720, though my netbook has a screen resolution of 1366x768, so there's little point to do that.
Then, we're able to start the server and check its status:
systemctl start vncserver@:1
systemctl status vncserver@:1
Or maybe stop it:
systemctl stop vncserver@:1Of course, if you'd like to have it always running, rather than starting it manually through SSH, you can also enable it like this:
systemctl enable vncserver@:1Personally, i just use two scripts in the user's directory, one for starting the service and another for stopping it.
Here's vnc-start.sh:
#!/bin/bash
echo "Starting VNC server..."
systemctl restart vncserver@:1
systemctl status --no-pager vncserver@:1
And here's vnc-stop.sh:
#!/bin/bash
echo "Stopping VNC server..."
systemctl stop vncserver@:1
systemctl status --no-pager vncserver@:1
Essentially that's it for the server config, now we just need to start the VNC server and connect from our local device!
The client setup
Here, i'll use the Remmina software to establish a VNC connection, since it's the closest to MobaXTerm that i've found on GNU/Linux distros.
First, we create a new VNC connection and give it a name we'll use:

Next up, we choose to configure an SSH tunnel so we're able to connect to the server by using a secure tunnel:
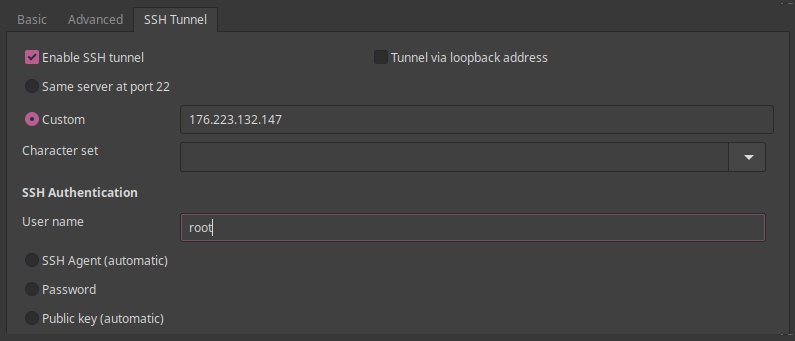
Here i also use a private/public key pair authentication to ensure that i don't have to keep password based authentication enabled on the server, should i choose not to do so. Either way, using an SSH tunnel is better than exposing the VNC server to the Internet, because that would pose a security risk.
Next up, i configure the settings for the actual connection and the user, for which we'd like to create a connection, using the vnc password that was created earlier:
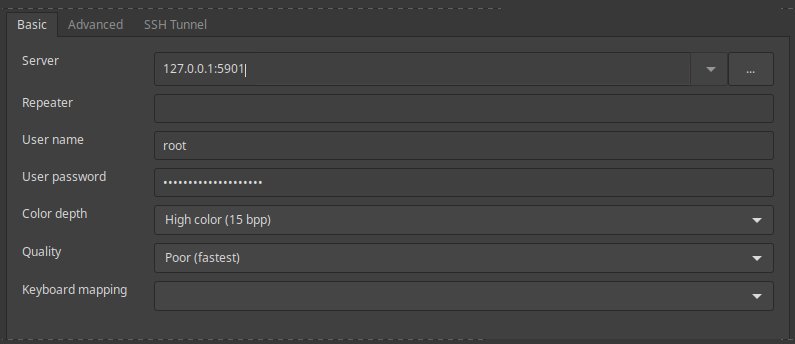
The interesting thing here is the address: 127.0.0.1:5901
The local address is used because we're connected to the server through the SSH tunnel already and the 5901 corresponds to the user mapping that we created. For example, if we'd also have a user with the mapping of :2, then this port would become 5902.
Once that's done, it should be possible to connect to the server without issues!
Here's a screenshot of it in action:
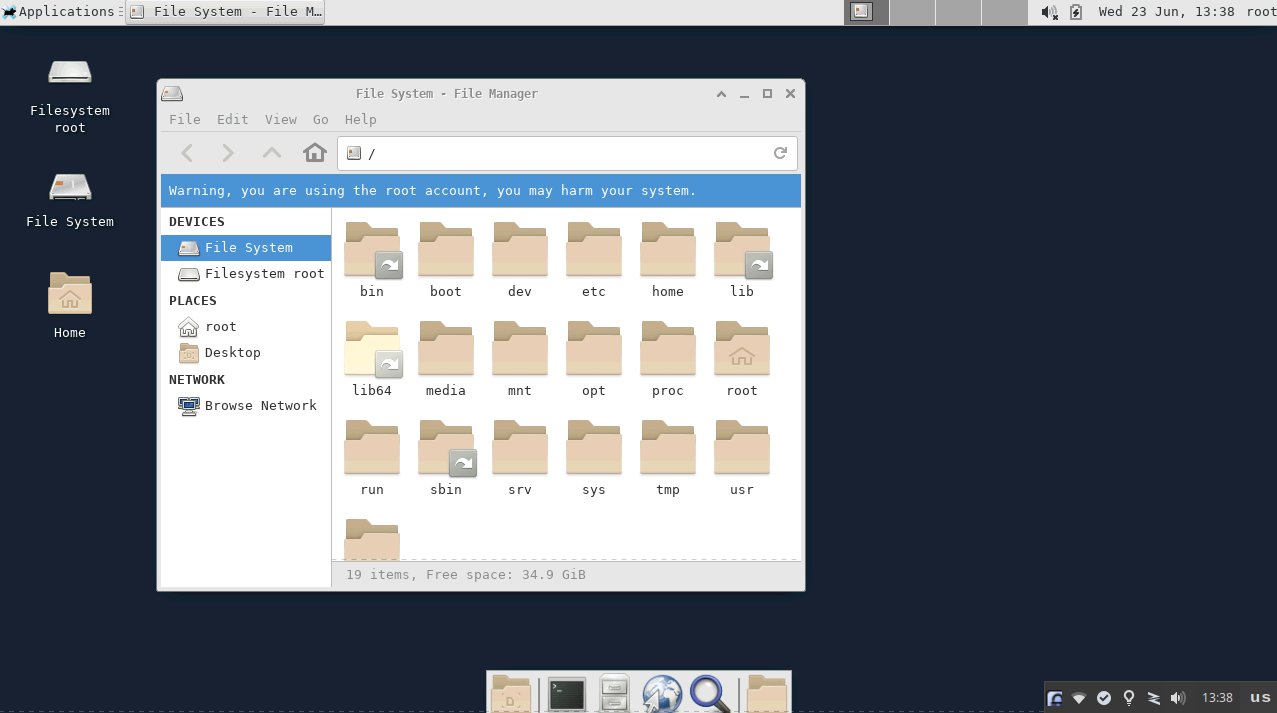
It should also be possible to create this same sort of setup for a regular user, not just a root one, and then install any software that you'd like to use for development on the remote machine - anything from Firefox, Visual Studio Code, or maybe even more heavier IDEs, as long as your network connection is good enough!
Of course, it's also possible to use the quality settings to lower the colors that you receive, or perhaps lower the resolution that the remote desktop is rendered at, but overall this is a pretty nice way to remotely use ANY piece of software.
Additional suggestions
Personally, i also like to install a task manager for XFCE and make it start automatically with the session:
yum install -y xfce4-taskmanagerWhich can easily be set up through the VNC connection that we just made under Applications > Settings > Session and Startup:
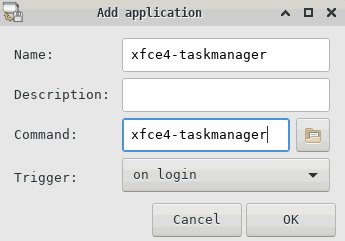
Which will then be launched when we connect to the VPS:
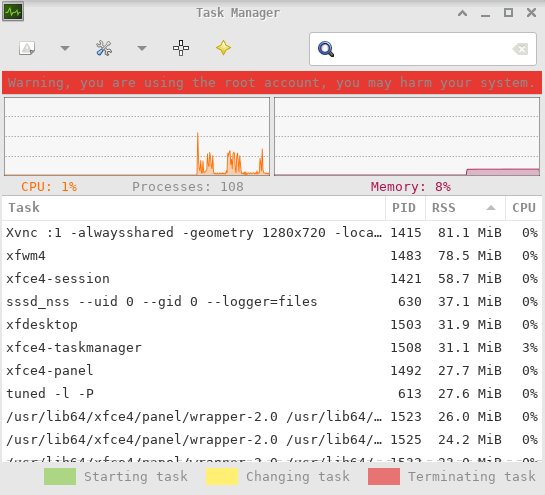
As you can see, the XFCE desktop isn't taking up more than a few hundred megabytes of memory, which i find it to be a good lightweight solution!
When the resource utilization of my servers isn't too high, i would occasionally consider adding it to them, just to be able to poke around in a user friendly way (or perhaps to just mount them through SFTP to access the file system with a local file browser). This is also useful for things like doing image processing and wanting to preview the results, any sorts of rendering work, or even running GUI software when CLI stuff just won't do! That's why i have XFCE and VNC set up on my homelab servers, since both of those have 16 GB of RAM and a few hundred megabytes really doesn't make much of a difference.
Also, choosing a high contrast theme can help when you're using the VNC mode with fewer colors, under Applications > Settings > Appearance:
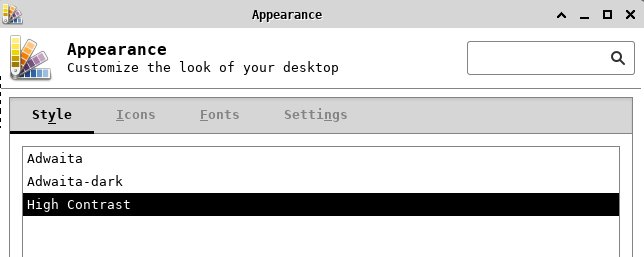
That way it will probably look a bit less broken, since there won't be many gradients to even attempt to display in the first place. Furthermore, disabling icons might also help somewhat, though i guess the video encoding, compression and other things depend on the particular implementation.
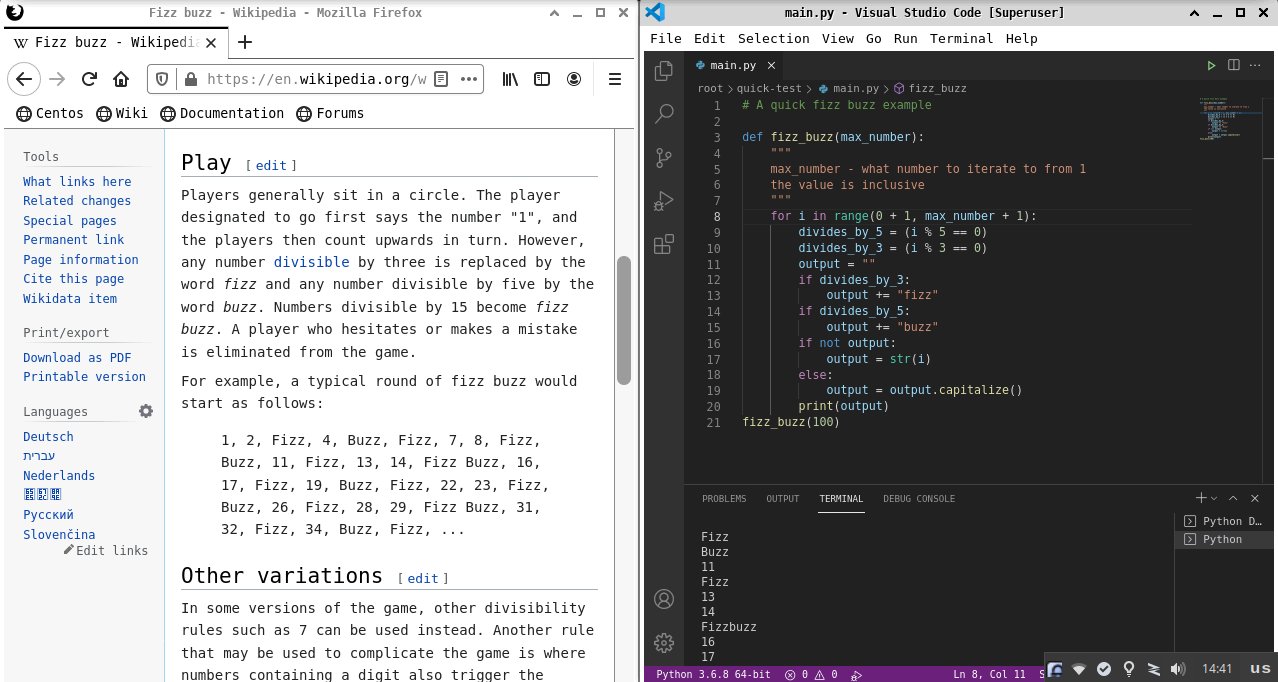
In the end, it's just a matter of installing the software that you'll use for development. For example, to install something like Firefox and Visual Studio code, you'd do this:
yum install -y firefox
wget https://az764295.vo.msecnd.net/stable/507ce72a4466fbb27b715c3722558bb15afa9f48/code-1.57.1-1623937083.el8.x86_64.rpm && yum localinstall -y code-1.57.1-1623937083.el8.x86_64.rpm
Now, you might notice that the download link is a tad funny, but that's just because i'm grabbing the direct link from the download page and am avoiding the redirect, as well as i don't feel like manually adding Microsoft's repo at the moment.
But i'm sure you get the idea:
Other posts: « Next Previous »