How to use dynamic DNS for your servers
Date:
Here's a quick tutorial for you! Sometimes you need to expose servers to the outside world, whose IP addresses will change either because you don't want to pay for static IP addresses to your ISP, or alternatively, because you're locked into sitting behind DHCP (such as when you're in a university network). In those cases, you'll probably want to use dynamic DNS!
Essentially, instead of you manually setting what your domain's IP address is, you instead install certain software on your server, which will automatically update this address, based on certain criteria, such as checking what the address assigned to a particular network interface is, or what's the address that shows up publically.
Provider configuration
For this particular example, we'll use NameCheap, though other providers should also work in similar ways. First, you'll need to navigate over to the "Advanced DNS" section of your domain's page:
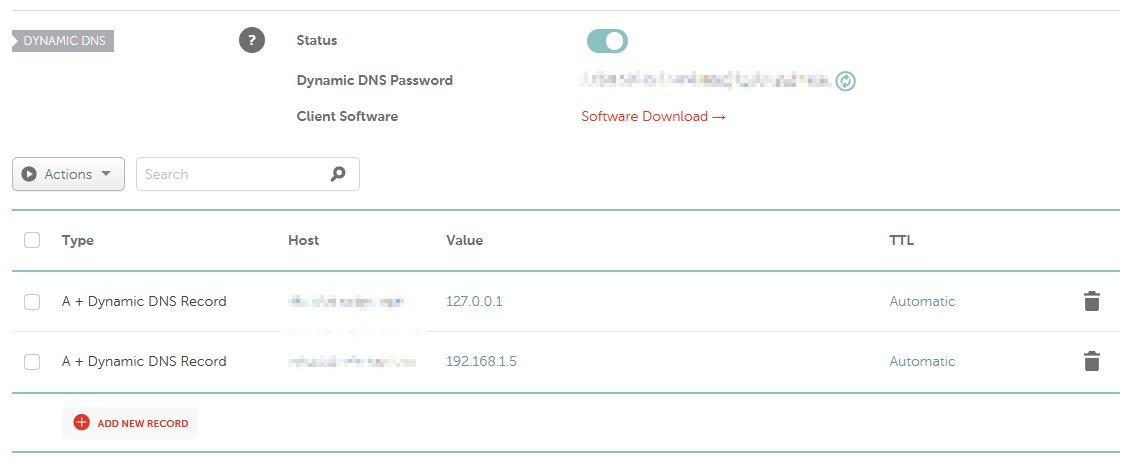
Then, scroll down to the "DYNAMIC DNS" section and enable that functionality if it's not already enabled!

After that's done, you can configure the domain names that you'd like to update dynamically. In the example below, you can see two servers that have dynamic DNS records. The more observant of you would notice that they point to local addresses, which i just use as an example in this case, because i am no longer behind a university network, but that doesn't really matter much in this case.
So, for example, if you'd like to update zero-two.servers.catboi.net, here you'd enter zero-two.servers, which would create the A record for the subdomain that we care about. In the case of NameCheap, it might also make the A records show up in the section above, but that's perfectly normal. So far so good, just make a note of the password that you're going to use here, since we'll need it for the server configuration, in the next steps.
Server configuration
Now, there are probably many pieces of software that provide the functionality that we need here, essentially a dynamic DNS client, but for the purposes of this demo, i'll show you how to configure the ddclient package within Debian, an OS that i'm personally pretty fond of! So, first thing's first, let's actually install it:
sudo apt install ddclientIt might ask you to enter your details during the installation on some distributions, but personally i find the configuration files easier to set up, so i just skip that entry. After that's done, it's possible to edit the configuration file for it under /etc/ddclient.conf, in my case the configuration looks like this:
protocol=namecheap

# The following line will take the address from the network interface
use=if, if=enp4s0
# The following line will take the address from a public service
#use=web, web=checkip.dyndns.org/

server=dynamicdns.park-your-domain.com
login=catboi.net
password='YOUR_PASSWORD_HERE'
zero-two.servers
As you can see, i've offered two ways of getting the IP address here, the first one (that's currently uncommented) being similar to running ip addr and checking the interface names against the IP addresses. For example, in my case the output of the command would look a bit like this:
enp4s0: ...
    link/ether ...
    inet 192.168.1.8/24 ...
so in this case the interface enp4s0 would return the 192.168.1.8 address, though in the case of the university network, i got a publically accessible IP address that i could then use.
Of course, you can check whether the configuration is correct, by running the command in debug mode manually instead of relying on the dynamic DNS service to run in the background. If you want to check everything and see the full detailed output, you can run the command as follows:
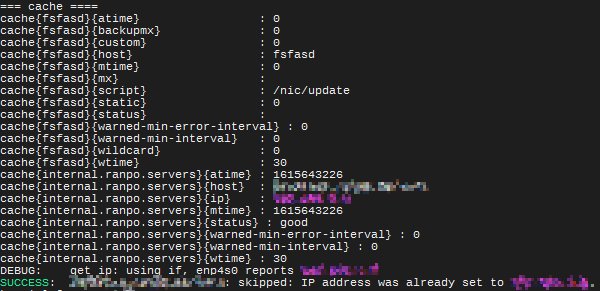
sudo ddclient -daemon=0 -debug -verbose -noquietThis should return something like the following:

I blurred out my details in this case because it displays another domain that would be irrelevant in this case, but you get the idea! If you refresh the NameCheap DNS page, you'll see that the address has also been updated, so now you should be able to use it!
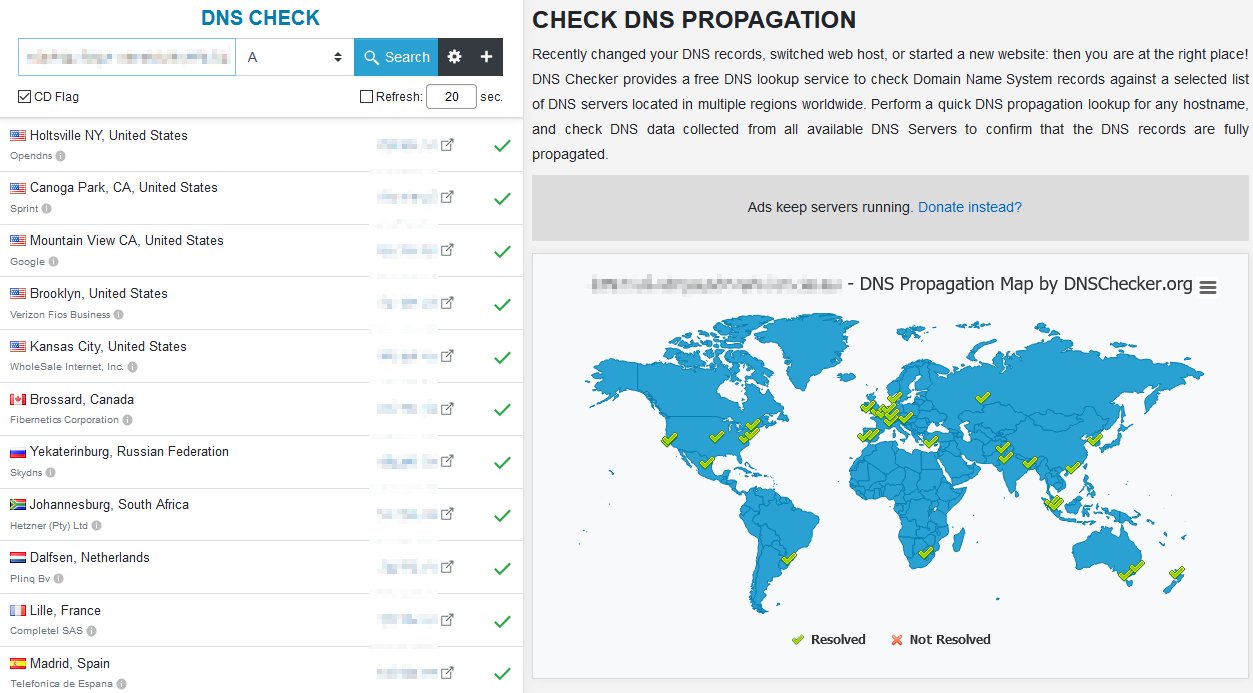
Additionally, if you want, you can also check the DNS record propagation with one of the available online tools:

Of course, in some cases it may take a while for the DNS records to properly propagate throughout all of the servers, but that should give you a good idea of whether everything did or didn't work. That's it for the time being!
Other posts: « Next Previous »