Windows bootloader: it just works
Date:
Here's a blog post of something positive that I recently experienced: the Windows bootloader is actually kinda cool!
I did move from Windows 10 to Windows 11 by installing it on a new 1 TB SSD, which will give me way more space than my old ~240 GB SSD had, in addition to future proofing it a bit more, as well as allowing my dual GPU setup to mostly work (even despite the interesting title of that blog post, it turned out to be mostly fine).
However, there were also some arguably stupid things that the Windows 11 installer did, which ended up with me having to move the bootloader over to another drive, in addition to shrinking the partitions to accommodate it. But let's not get ahead of ourselves here. Let's start by illustrating that the typical partition layout on a drive for a Windows 11 install might look like the following:
- EFI partition (500 MB) - this contains the bootloader for your UEFI setup
- MSR partition (16 MB) - this doesn't have user accessible data but is needed for Windows to work properly
- data partitions for your drives (however much space you have) - where your "C: drive" would reside
- recovery partition (650 MB) - this contains some tools for recovering from situations where the OS isn't bootable (WinRE)
When you install Windows 11 on a blank drive, typically all of these will be created.
My situation
In my case, while I did install the OS on a blank drive, I still had a drive with Windows 10 connected to it (my old SSD), so the installer basically saw that there already is an EFI partition on the old drive and reused it, instead of creating another one on the new drive. Basically, this saved about 500 MB of space (which I don't care about) but also means that I can't wipe the old drive, because then the system would no longer boot.
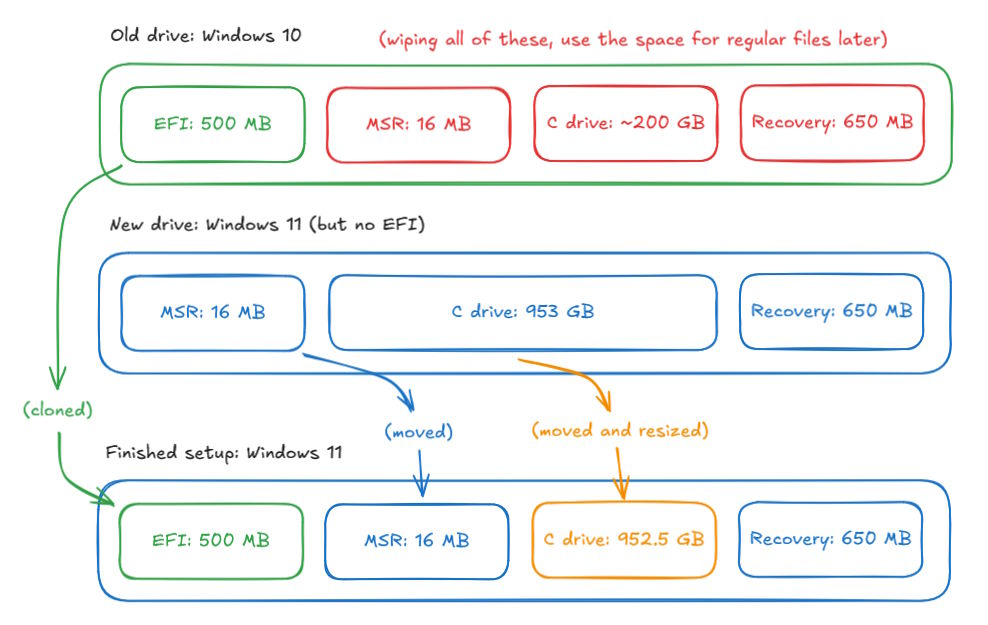
Obviously, this was not acceptable, so I came up with a slightly wild plan: instead of reinstalling the whole thing again, I would just shrink the data partition on the new drive, move it a bit to the right, also move the MSR partition, and then squeeze the EFI partition from the old drive (straight up cloning it) in at the very start of the new drive. Then, all I'd have to do is wipe the old one clean and tell the BIOS to use the bootloader on the new drive:
In general, this is something that you'd regard as a "bad idea", because there's a serious chance of things going wrong and experiencing data loss. Thankfully, I also had some Seagate 1 TB HDDs laying around as well as both some 2.5" and 3.5" enclosures, so I could just flash Rescuezilla on a USB drive and use it to backup the entire drive that I was about to mess around with:
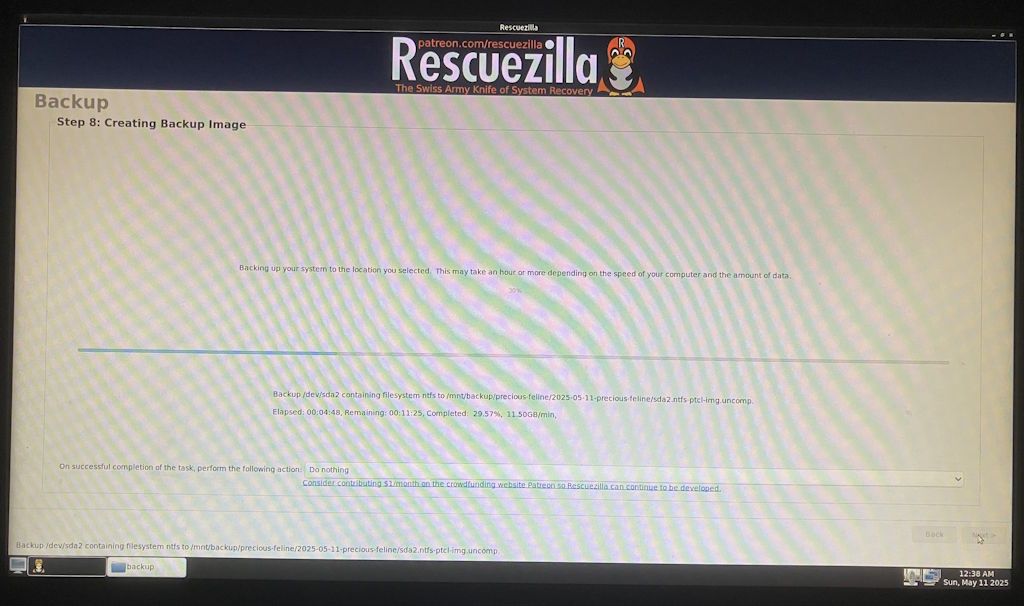
Honestly, it is great software! It's based on Clonezilla except also has a nice GUI and a desktop environment alongside tools like GParted. It is simple to use and could do a sparse copy of the NTFS volume as well, so instead of 953 GB to copy instead it just needed to move the actual ~200 GB of things installed on the OS. In my eyes, this is definitely a piece of software that you should have flashed on a USB stick/SD card somewhere.
Definitely one of those pieces of software that you should donate a bit of money to if you find it useful (I also donated to FreeFileSync, that one is great too), they even seem to have Patreon, although I couldn't find a way to donate to Clonezilla.
If you do have a bit of a closer look at the admittedly low quality photo I took of my screen at about 1 AM when I was doing this process (since I couldn't be bothered to figure out where/how to persist screenshots in the LiveCD), you'll notice that the indicated speed is around 11.50 GB/minute or just under 200 MB/s. It later dropped a bit more, but that's how I realized that my new SSD isn't all that good.
Quick tangent: SSDs are not made equal
There are various types of NAND flash used in the manufacture of SSDs: SLC, MLC, TLC and QLC.
Essentially, as the bits per cell of memory increase, you do get more storage, but both worse durability, as well as lower performance. To offset this, many of the SSDs out there use SLC cache to improve performance: meaning that under "normal" usage most of the time they'll appear to be reasonably fast, but in those cases where you try to copy a lot of data in one go, the cache will get exhausted and the write speeds will decrease.
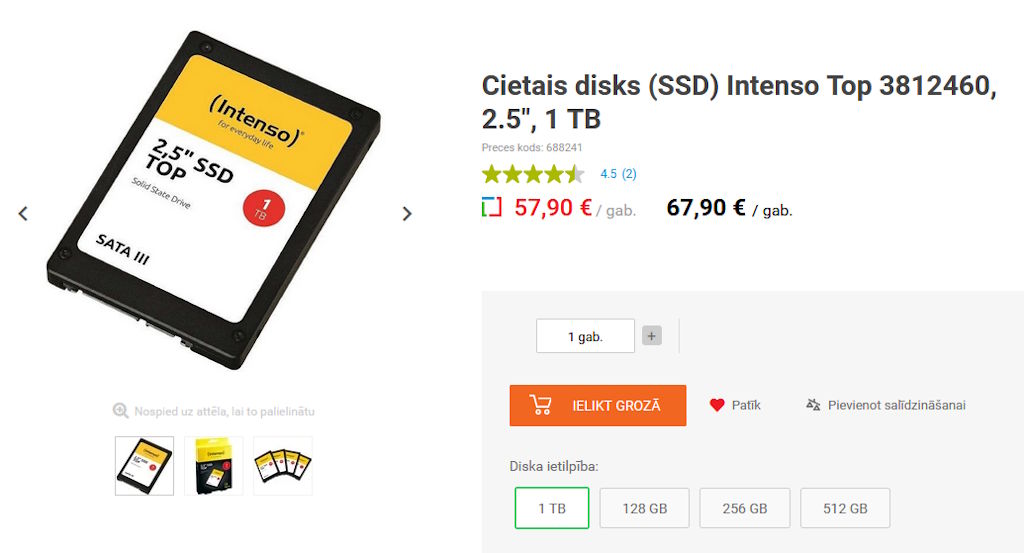
The problem is that very often none of this is advertised and while TLC is pretty good, if you end up with a QLC drive you're usually not gonna have a very good time if you want to use it for storing a lot of data or doing backups with it, which involve moving around a lot of data in one go. For example, look at this e-commerce listing for the drive I bought:
Look at the vendor's page which has a data sheet that isn't that much more illuminating:
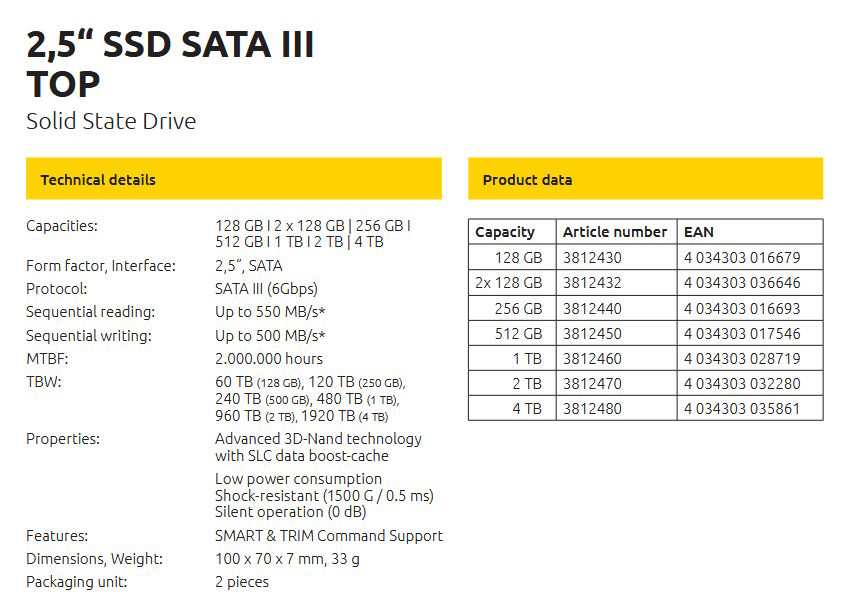
It also isn't very clear about what sort of a memory it uses, in particular:
Advanced 3D-Nand technology with SLC data boost-cache
what on earth is that even supposed to mean? I'm saying that you probably want to look up the drive you want to buy before committing to a purchase, because I experienced first hand how the performance wasn't exactly great. I'm not sure how withholding details like that is okay, as well as not listing the actual read and write speeds for large sequential transfers once the cache is exhausted, nor mentioning how big the SLC cache is in the first place, yet everyone seems to be doing that.
I did run some benchmarks and you can see the results below:
- upper left (H: drive): my old Patriot Blast drive, around ~240 GB in capacity
- upper right (C: drive): my new OS boot drive, Intenso Top, 1 TB
- lower left (D: drive): one of my data drives, a Seagate 1 TB HDD
- lower right (F: drive): my new games drive, Intenso Top, 1 TB
Here's the read and write speeds:
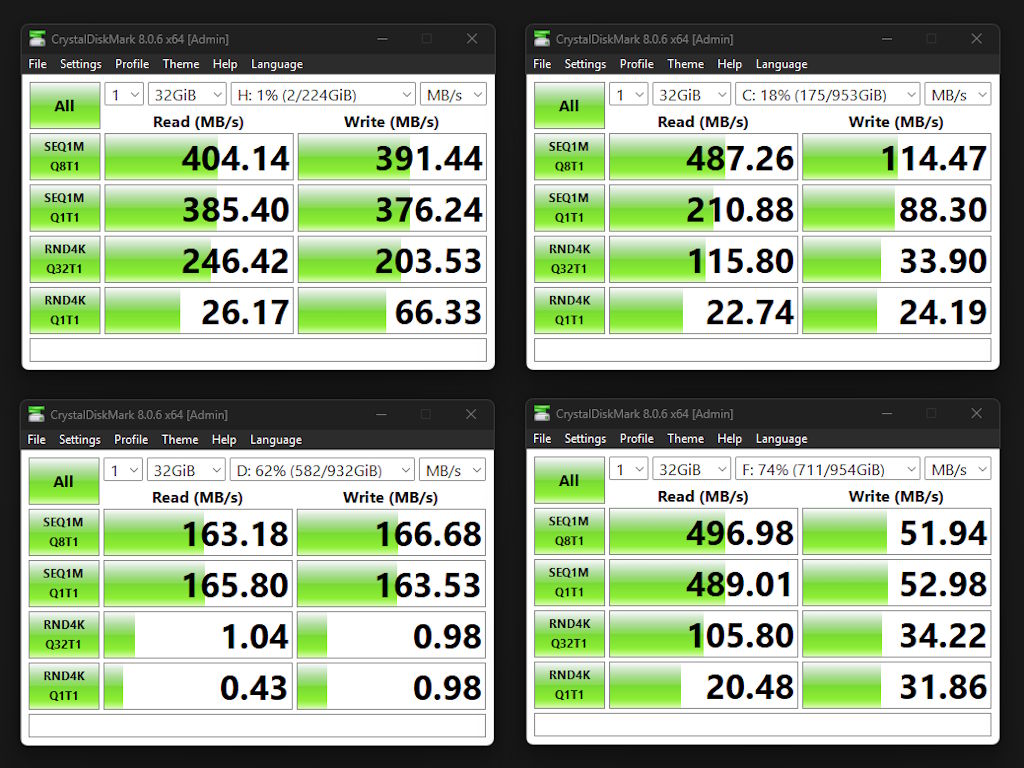
There's certainly a bit of variance between the test runs but I didn't really have hours to spend on this, this is more or less illustrative, yet also quite revealing: you can see that for large sequential transfers my 1 TB Seagate HDDs do end up being better than the 1 TB, while for more read heavy workloads and ones that might involve a lot of smaller files being accessed randomly (such as for a boot drive for an OS), the SSDs still are a decent fit regardless of the type, which also applies for things like games that are primarily read heavy workloads.
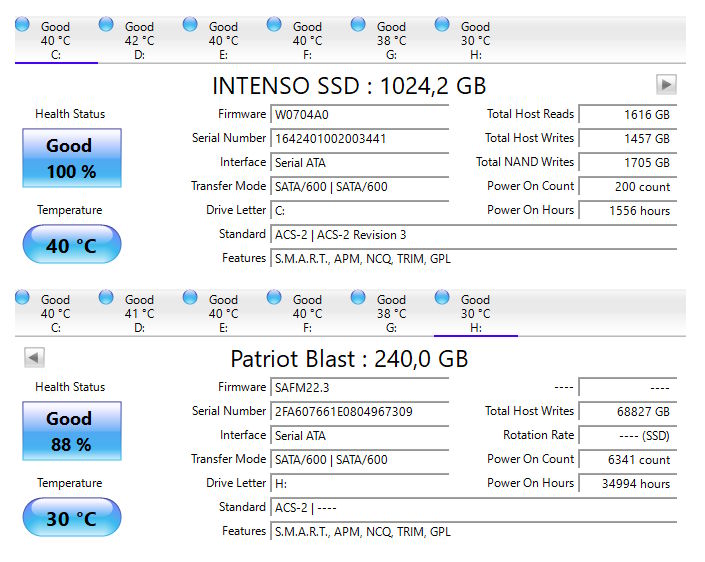
Either way, I don't believe I can complain that much here aside from advising others to do some research, because the pricing itself was not that bad, although I could have probably used the money a bit better had I been more careful. It's still nice to not fear running out of space for my Windows 11 install though and to have a drive that is quite unlikely to have that many reliability issues anytime soon vs a drive that I've been using in my main PC for years:
Back to the actual OS bootloader move process for now!
The data move
After doing the backup with Rescuezilla, I then proceeded to use GParted for editing the partition layout and copying the EFI partition over. I will say that it actually had some bugs in it, such as the copied partition initially showing up as 499 MB and then trying to increase its size before the write operation to the proper size of 500 MB creating a separate step:
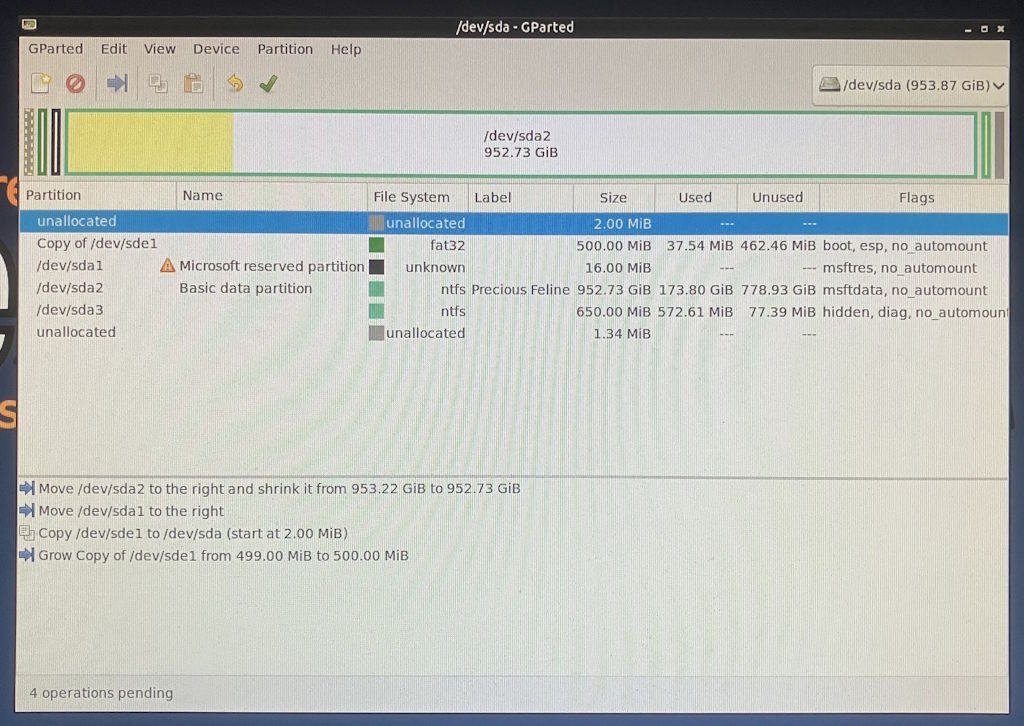
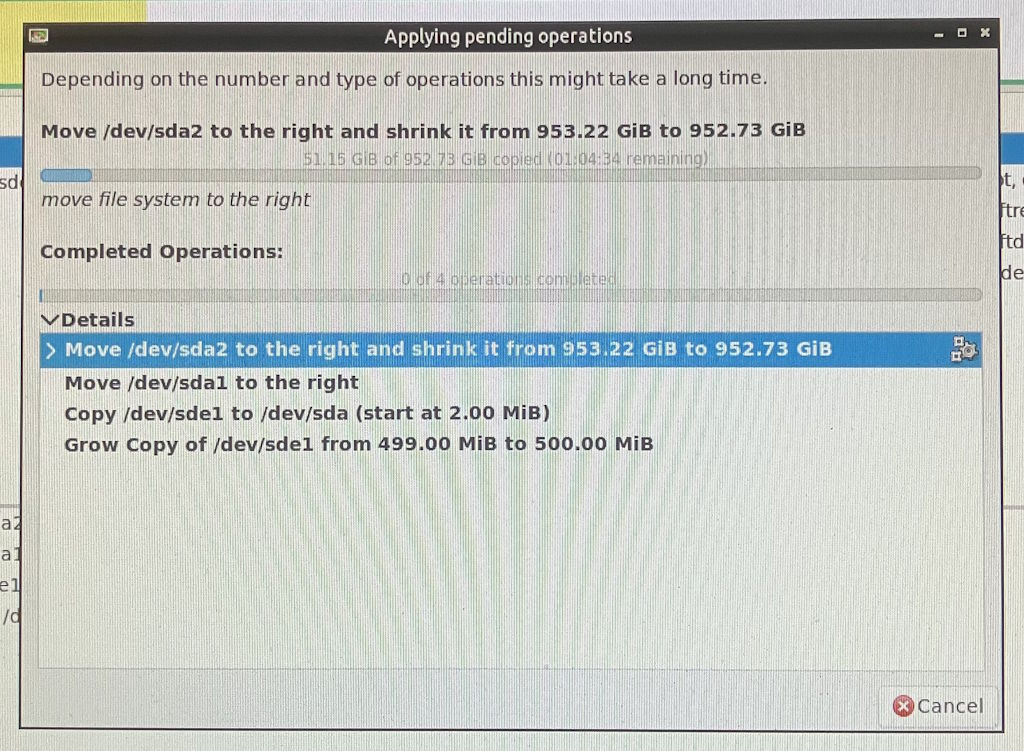
This would actually fail later and make me repeat the EFI partition move, but thankfully the more serious initial step of shrinking the NTFS partition without data loss and then proceeding to move it to the end of the freed up space to leave the start of the drive free (after also moving the MSR partition) worked just fine. It did take a bunch of time, more or less double of what was indicated here at the start, because it had to go over all of the partition and couldn't do what I'd call a "sparse move", but at least it worked out fine in the end:
I do quite also enjoy software like MiniTool Partition Wizard, although their bootable version seems to be way out of my price point. There's also the AOMEI Partition Assistant but honestly a Linux distro LiveCD with GParted is fine for bootable stuff and the built in Windows partition editor is fine for messing around with regular data drives, especially for something I use very infrequently.
Now, here's the good news: it worked. I moved the EFI partition over to the start of the new drive (even if I had to do the cloning after moving the old partitions, only then the size would show up correctly as 500 MB from the start in GParted), wiped the old drive and when I started up my computer, the BIOS correctly showed that there is a bootloader on the new drive. Furthermore, even if the actual partitions had been moved around a bunch, I didn't even need to do boot repair, it literally just decided to boot up the OS fine. I'm not quite sure how they managed to make it work like that (probably references by UUID or something), but that's pretty great!
Of course, initially, I did try to do a boot repair anyways, thinking that moving partitions around would necessitate, which on the other hand was pretty useless and just gave me a generic error:
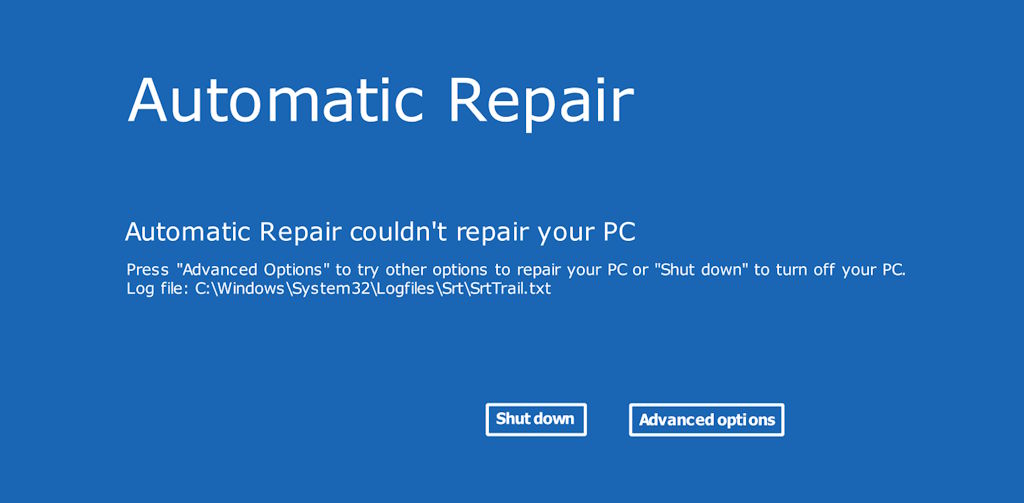
(this image is borrowed from the Internet, because I didn't take another phone picture of it)
I did later run into some silly situations with FreeFileSync when I decided to setup some backups for my new OS and drive setup. The old drive will also store my programming projects, so loading them and working with them won't slow down the main OS install on the boot drive, basically software can go wild with node_modules or whatever. However, when copying files over, it seems like the underlying filenames were updated correctly, yet somehow the display names of the folders on my backup drive were the same:

It wasn't a bit issue because those two folders are pretty small and I could see the actual values in Command Prompt, PowerShell and also Git Bash, so fixing things wasn't that difficult. Basically, the actual folder names were, for example, Downloads and myuser Downloads, yet for whatever reason Explorer got confused.
Summary
Regardless of the few challenges along the way, now I have a working OS install with a bootloader on the same drive, which works great. If I ever want to replace the old SSD with something else, then I'll also be able to do so, ripping it out will no longer risk my OS becoming unbootable. I don't quite understand why the Windows 11 installer didn't give me an option to put the bootloader on the new drive as well, or even do it by default, cause if people ever want to upgrade from their new OS install to a new one on a new drive, they would probably expect to be able to pull the old drive with no issues, yet this would make the OS unbootable.
The bootloader itself is pretty good though and it was pleasant to see that I can just clone a partition to another drive without even having to regenerate the UUID or rebuild anything, the Windows bootloader just worked: who knows, maybe Todd Howard helped them work on it in secret. I was also considering maybe going for a Linux dual boot setup, but if I ever have to do that, I'll probably move some of my data drives over to my homelab servers (maybe even get Samba working instead of having to rely on RaiDrive) and do that on an entirely new SSD, since currently all of the SATA slots are filled out (and I had to ditch my M.2 with Linux due to needing the PCIe lanes for the second GPU):
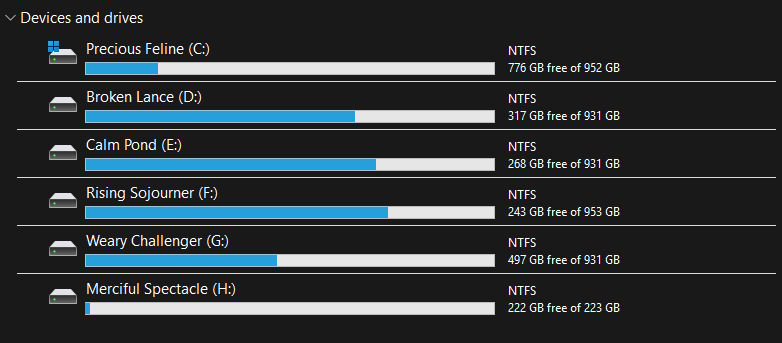
I do also have to say that I don't really feel bad about having a bunch of 1 TB drives: for example, E is the backup drive that gets select data from C, D, F, G and H, then F is the dedicated game drive, whereas D and G is there for all sorts of files. It wasn't super expensive to buy them (there was a time when those Seagate 1 TB HDDs were about 40 EUR a pop), I still have some backups in a cupboard in packages if I ever need to pull one, plus I can also easily backup the contents of an entire drive with WinSCP to one attached to my homelab servers if I feel like it.
Could I have done most of this with fewer but beefier drives? Sure, but those drives might end up being more expensive overall, since I can't just buy one drive but also need a backup (or multiple) in case it fails. Drives don't seem to fail that often, but I've definitely had 2-3 die over the years, so in closing - definitely make sure that you have backups of your data as well!
Other posts: « Next Previous »